Using the workflow editor
The Flow Editor is where you build and inspect a workflow's logic. Work on the canvas directly or ask the agent to help with the graph, then test the result before connecting it to live data.
Open a workflow
Open Workflows in your project's navigation. Create a workflow using the create control, or open an existing one, then select Flow Editor.
The canvas contains the nodes and connections for the selected flow. Select a node to inspect its settings; use its documentation control for the node-specific reference. Run starts the workflow, Logs shows execution messages, and Settings includes configuration such as webhook triggers.
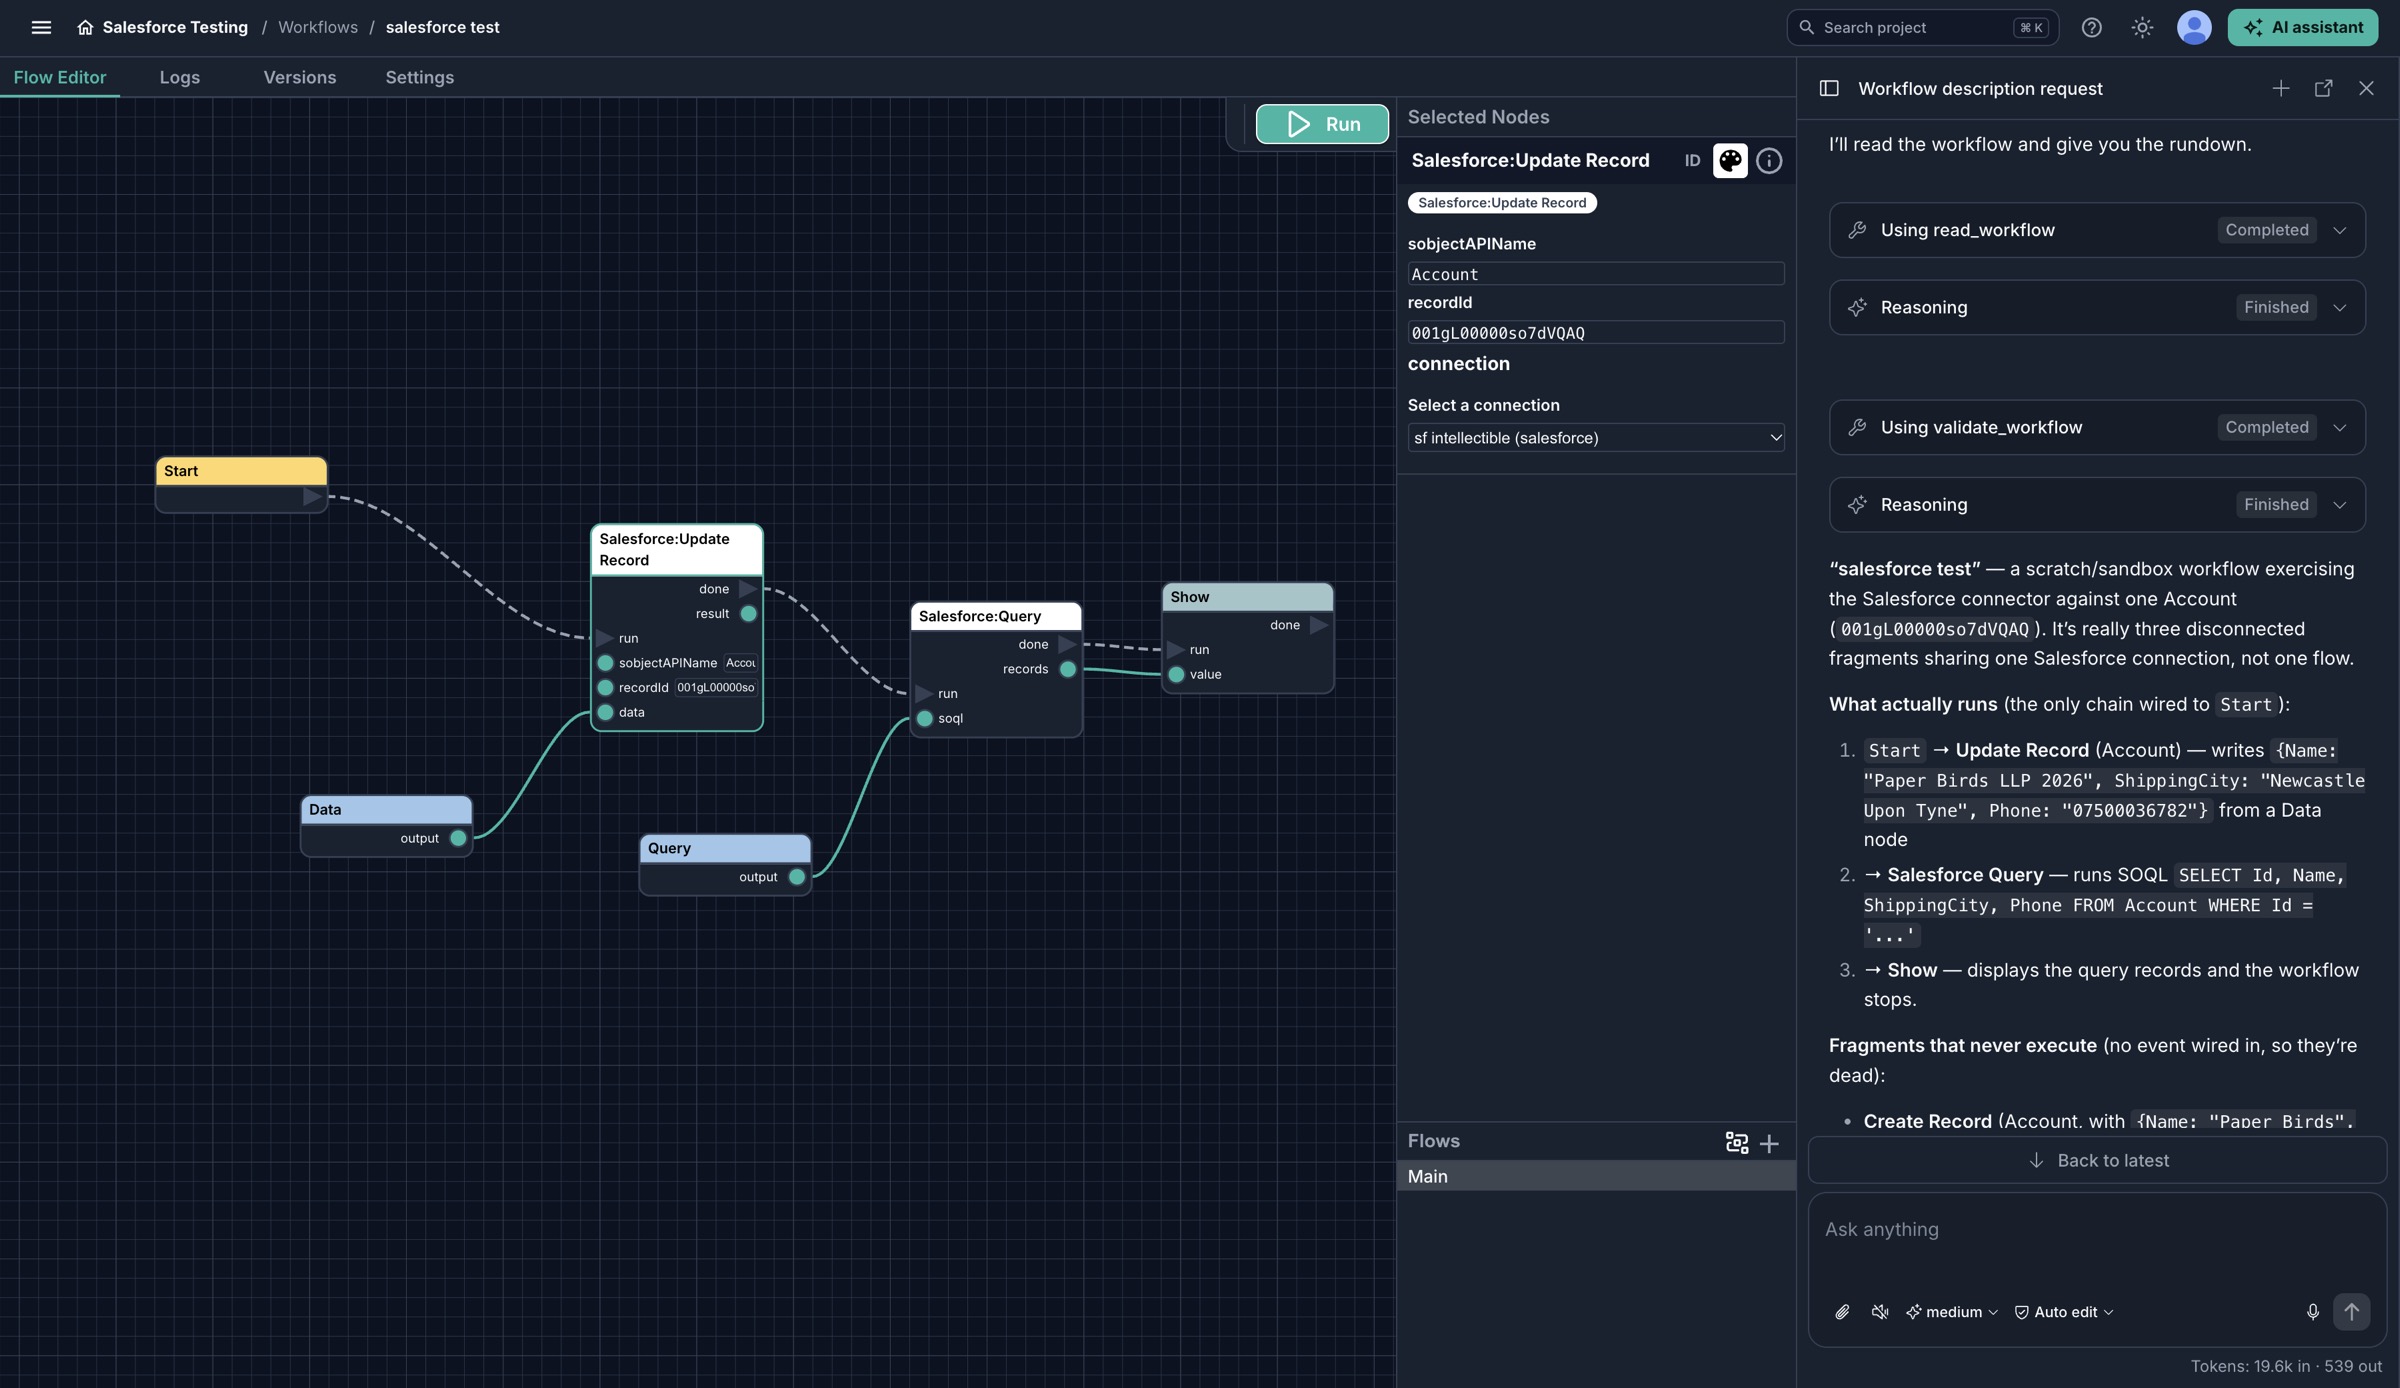
Inspect the flow, configure a selected node, and work with the agent side by side. Dashed event connections sequence the actions; solid data connections supply their values.
Graph edits are saved as you make them. Treat changes to a workflow used by an application, webhook, or scheduled job as changes to a shared process, not a private draft.
Add and configure nodes
Right-click an empty part of the canvas to open the node menu. Search for a node by name or browse its categories, then select it to add it to the flow.
Select the node and configure its fields. Give important nodes descriptive labels so a larger graph remains readable. For nodes that use external accounts, select an appropriate project connection; adding a node does not authenticate the service for you.
Drag nodes to arrange the canvas, or use Auto Arrange Nodes. The editor also provides undo and redo controls for graph edits. Undoing an edit does not undo the effects of a workflow run.
Connect events and data
Drag from an output socket to the corresponding input socket on another node. There are two different kinds of connection:
| Connection | Purpose | Example |
|---|---|---|
| Event | Tells an action when to execute. | Start.fired → Log.run |
| Data | Supplies a value for a node to use. | Plain Text.output → Log.message |
Connect events to events and data to data. An action can have all its data connected and still never execute if nothing triggers its event input.
Controlled nodes perform actions when triggered. Their completion event often starts the next action, but socket names differ: a node might accept run or set, and a loop uses finished for the work after the loop. Read the labels on the node rather than assuming every action uses the same names.
Uncontrolled nodes, such as Plain Text, provide values when another node needs them. They do not need an event connection. A data input uses a connected value when one exists; otherwise, nodes commonly use the value configured in their settings.
Build a first working example
Start with a small workflow that writes a greeting to the log and returns it as a named output. It needs no external account or AI call.
- Add Start, Plain Text, Log, and Set Output nodes. If the flow already contains a Start node, use that one.
- Set Plain Text to
Hello from Intellectible. - Set the Log node's Level to
info. - Set the Set Output node's Name to
greeting. - Make these connections:
| From | To | Kind |
|---|---|---|
Start — fired | Log — run | Event |
Plain Text — output | Log — message | Data |
Log — done | Set Output — set | Event |
Plain Text — output | Set Output — value | Data |
Click Run. Open Logs, select Editor, and refresh to find the greeting. The workflow also returns a named output, greeting, which an API caller can retrieve; writing a log message and returning an output are separate operations.
If you need to stop a running editor execution, use Abort and check its resulting state. Stopping a run does not reverse messages already sent or records already written.
Accept inputs from a caller
To reuse the workflow with different data, add an Input node and set its Name to the input you expect, such as message. Connect its value to the actions that need it.
Names are the contract between the workflow and its caller. For an API call, inputs.message supplies the Input node named message. A webhook instead supplies the named inputs payload and webhook. MCP tool arguments and job-step inputs have their own setup, described in their guides.
The editor's Run button starts a normal run; it does not simulate every external caller's input payload. Test the real entry point as well. Keep a safe test value while developing, then replace it with the Input connection and send representative data from the caller.
Organise larger workflows
Use branches for decisions and loops for repeated work. Connect the work inside a loop to its loop event, and the work after the loop to its completion event. Avoid connecting the final action to an event that fires once per item unless you intend to repeat it.
For reusable pieces inside a workflow, use Add A New Flow. Define that flow's named Input and Set Output nodes, then add it to the calling flow from the node menu's Workflows category. These internal flows organise one workflow; a job flow coordinates separate workflow executions.
Before connecting live data
- Check that each intended action has an event path from the correct entry point.
- Confirm input names, data types, credentials, and required settings.
- Check that the output-setting nodes actually execute, including on branches.
- Try an empty input and a failure case as well as the successful case.
- Review logs and ask the agent to validate the graph.
For more detail, see data types and the node reference.