Connections
Intellectible has a built in connections system which allows workflows to connect to 3rd party applications. Connections are authenticated accounts which can be used by workflows to perform actions on behalf of the authenticated user. They are created and managed in the connections tab on the sidebar. Use this guide to learn how to create and manage connections, create 3rd party connected apps, and troubleshoot common issues. For details on using connection nodes in your workflows, see the Connection Nodes section.
Available Connections
Currently available connections include:
- Gmail
- Microsoft Outlook
- Google Drive
- Google Calendar
- Microsoft Sharepoint
- Slack (custom OAuth apps see guide)
- Salesforce (custom External Client Apps see guide)
Connection Creation Process
-
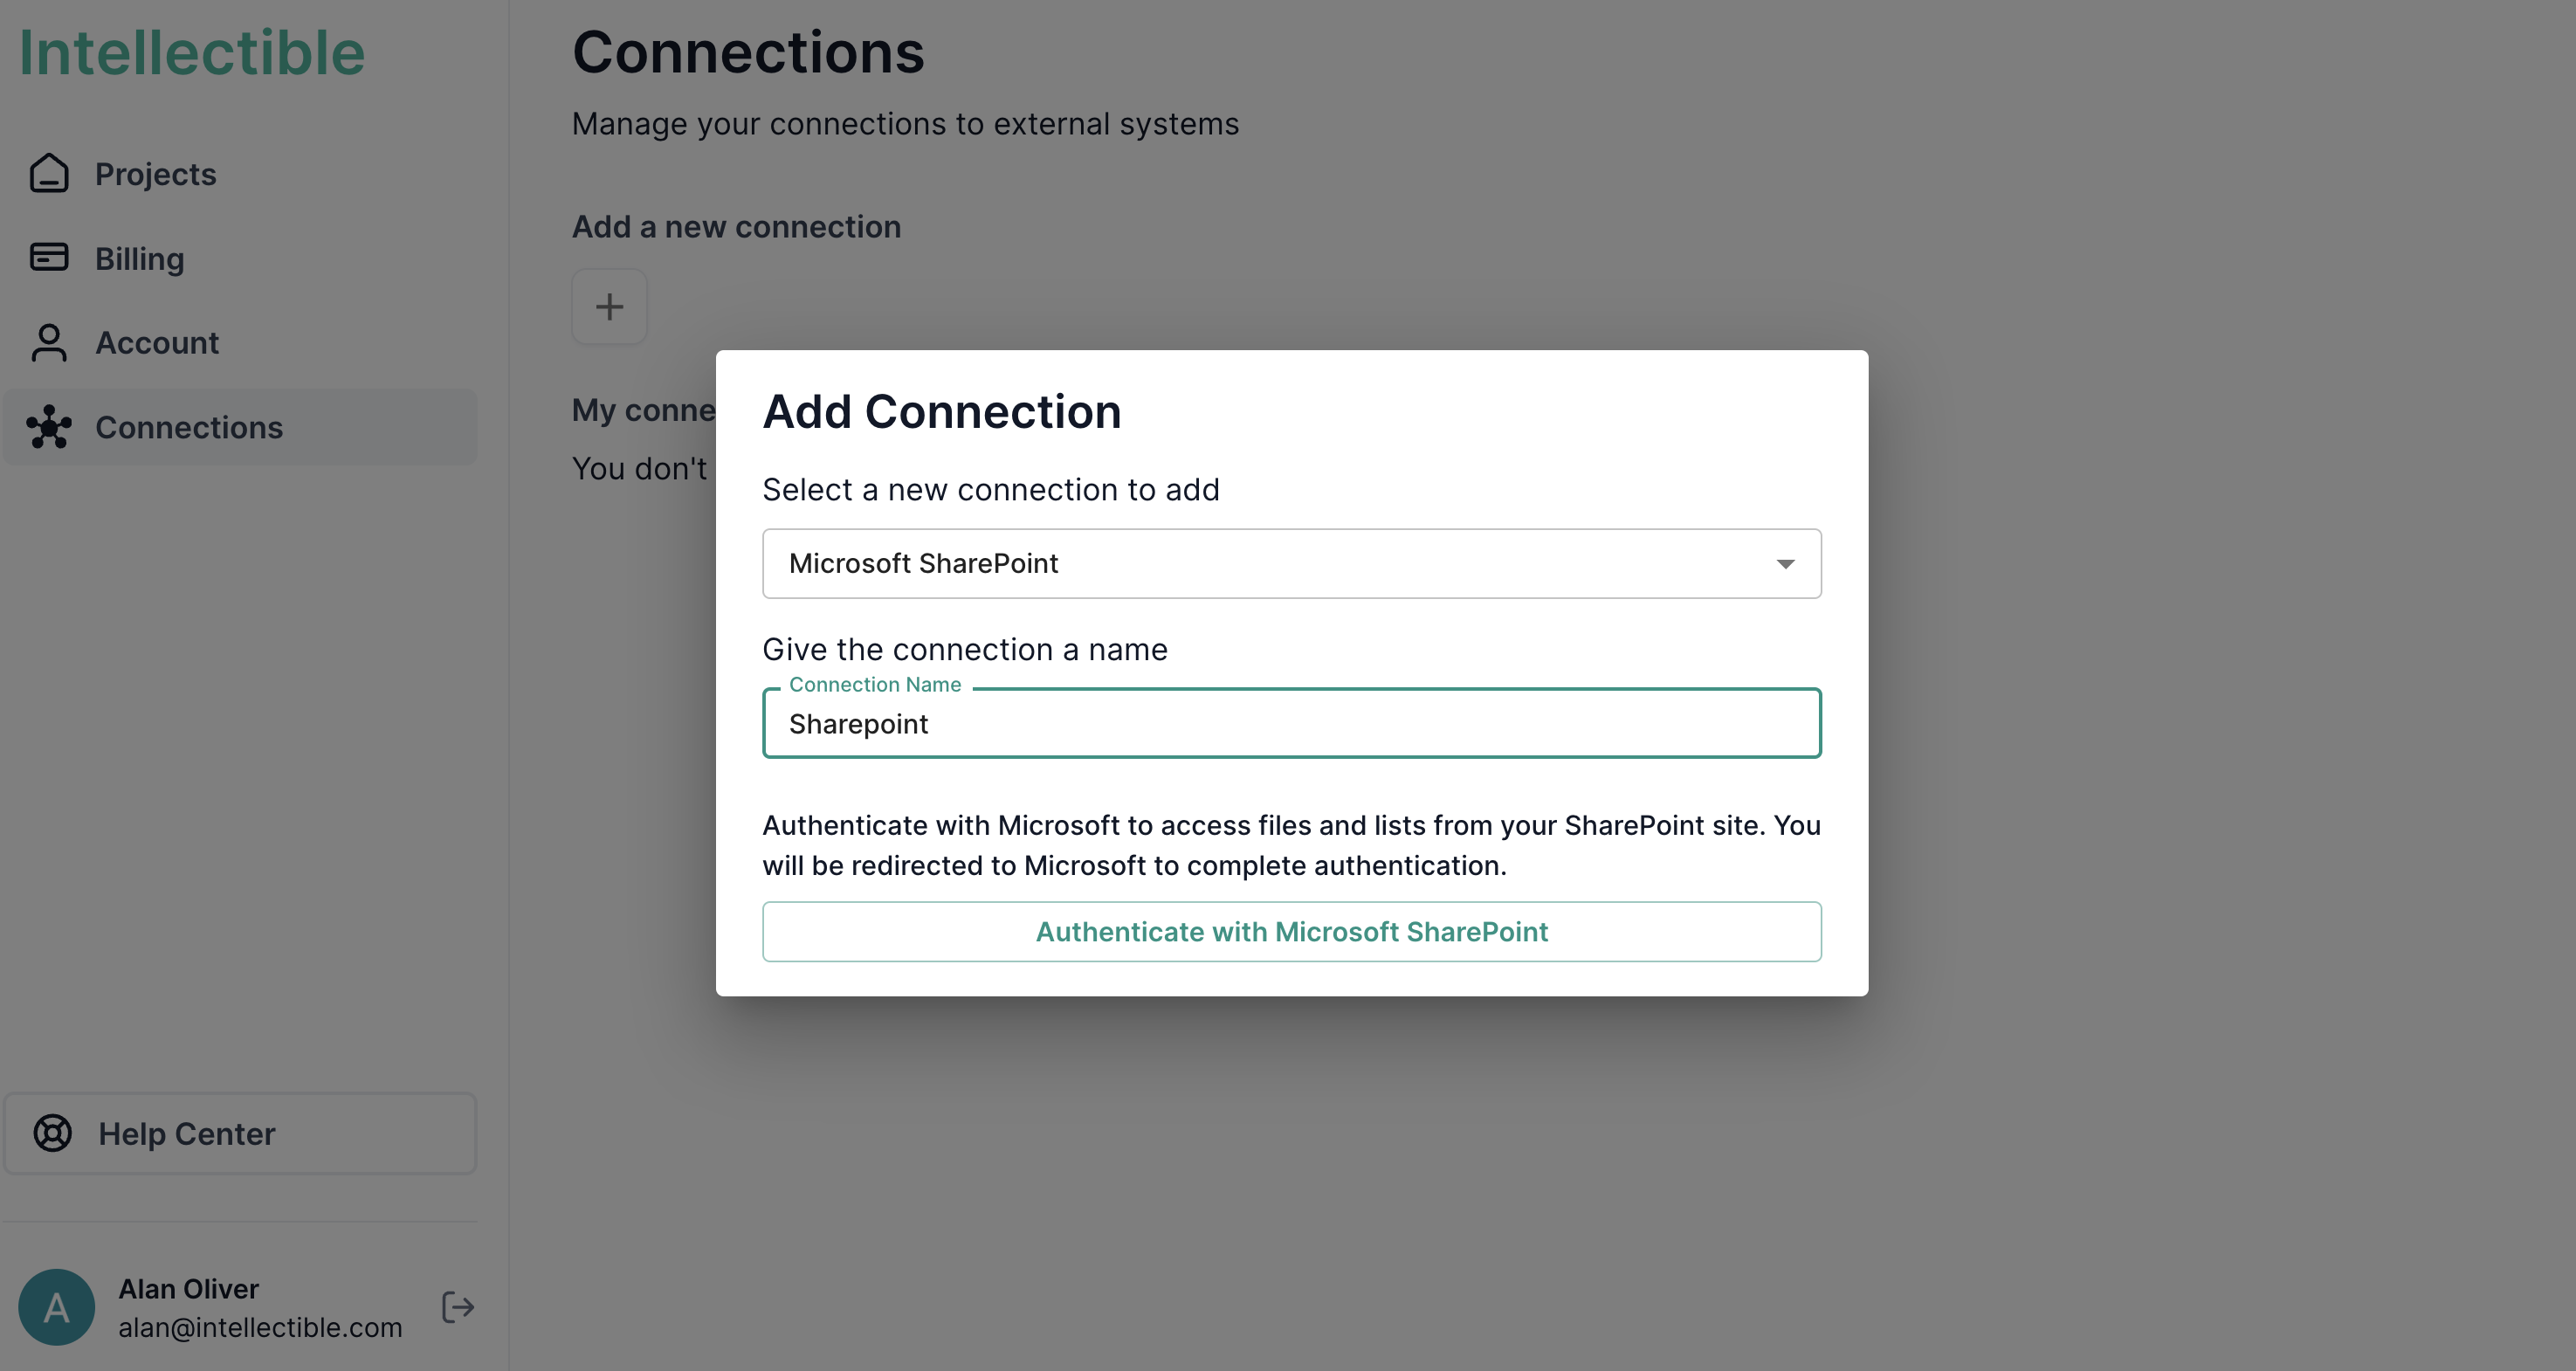
First, head to the connections tab on the sidebar. Click "Add Connection".
-
Choose from the list of connections and give the connection a name. Authenticate with the service.
-
Select your email account you wish to give access to workflows.
-
Once verifying the connection is successful, select "Manage Projects" and add the connection to the project which will contain the workflows requiring external connections.
Creating a connection:
For Gmail accounts it is generally straightforward to authenticate a google account. Microsoft accounts may need some extra configuration to ensure a smooth setup. See the Troubleshooting Microsoft Accounts section to ensure your account is configured correctly for your organization.
Slack OAuth Connections
Intellectible supports Slack app connections, allowing you to create workflows that interact with Slack using your own Slack app credentials.
Creating a Slack App
-
Create a new Slack app
- Go to https://api.slack.com/apps
- Click "Create New App"
- Select "From scratch"
- Enter your app name and select the workspace where you want to develop the app
- Click "Create App"
-
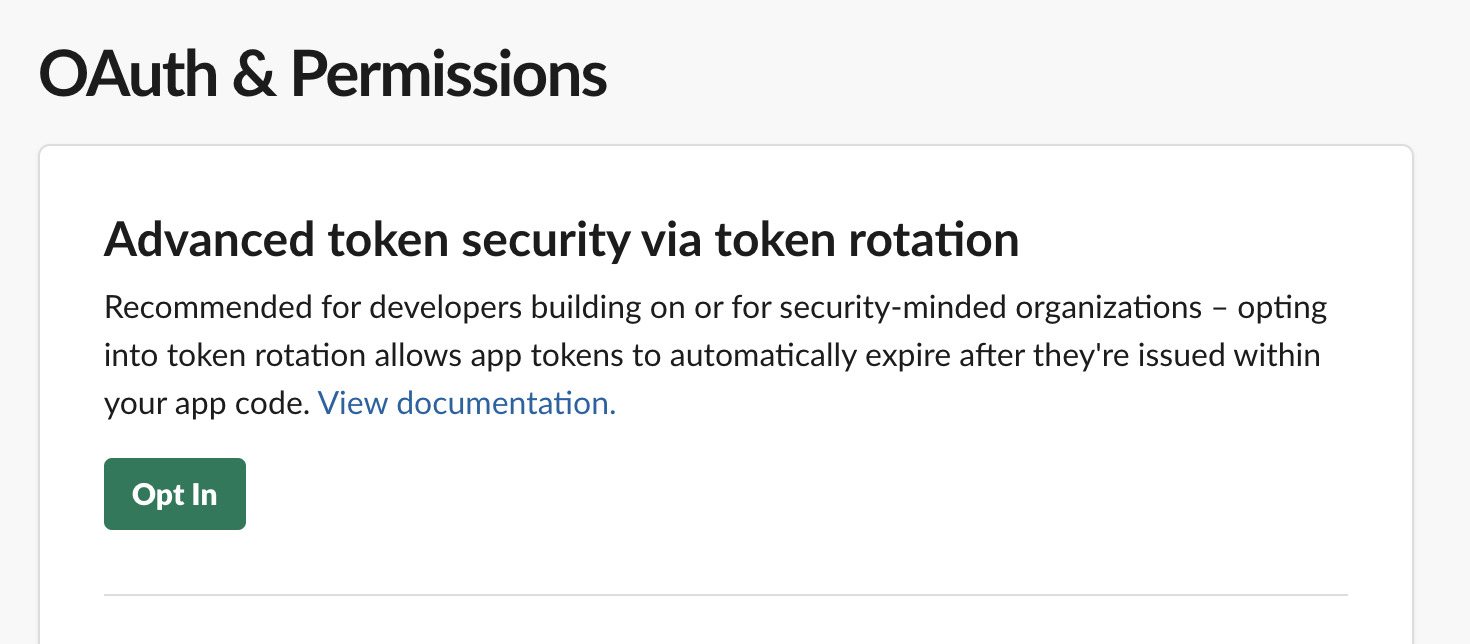
Configure OAuth & Permissions
- In the left sidebar, navigate to "OAuth & Permissions"
- Click "Opt In" to enable refresh tokens
-
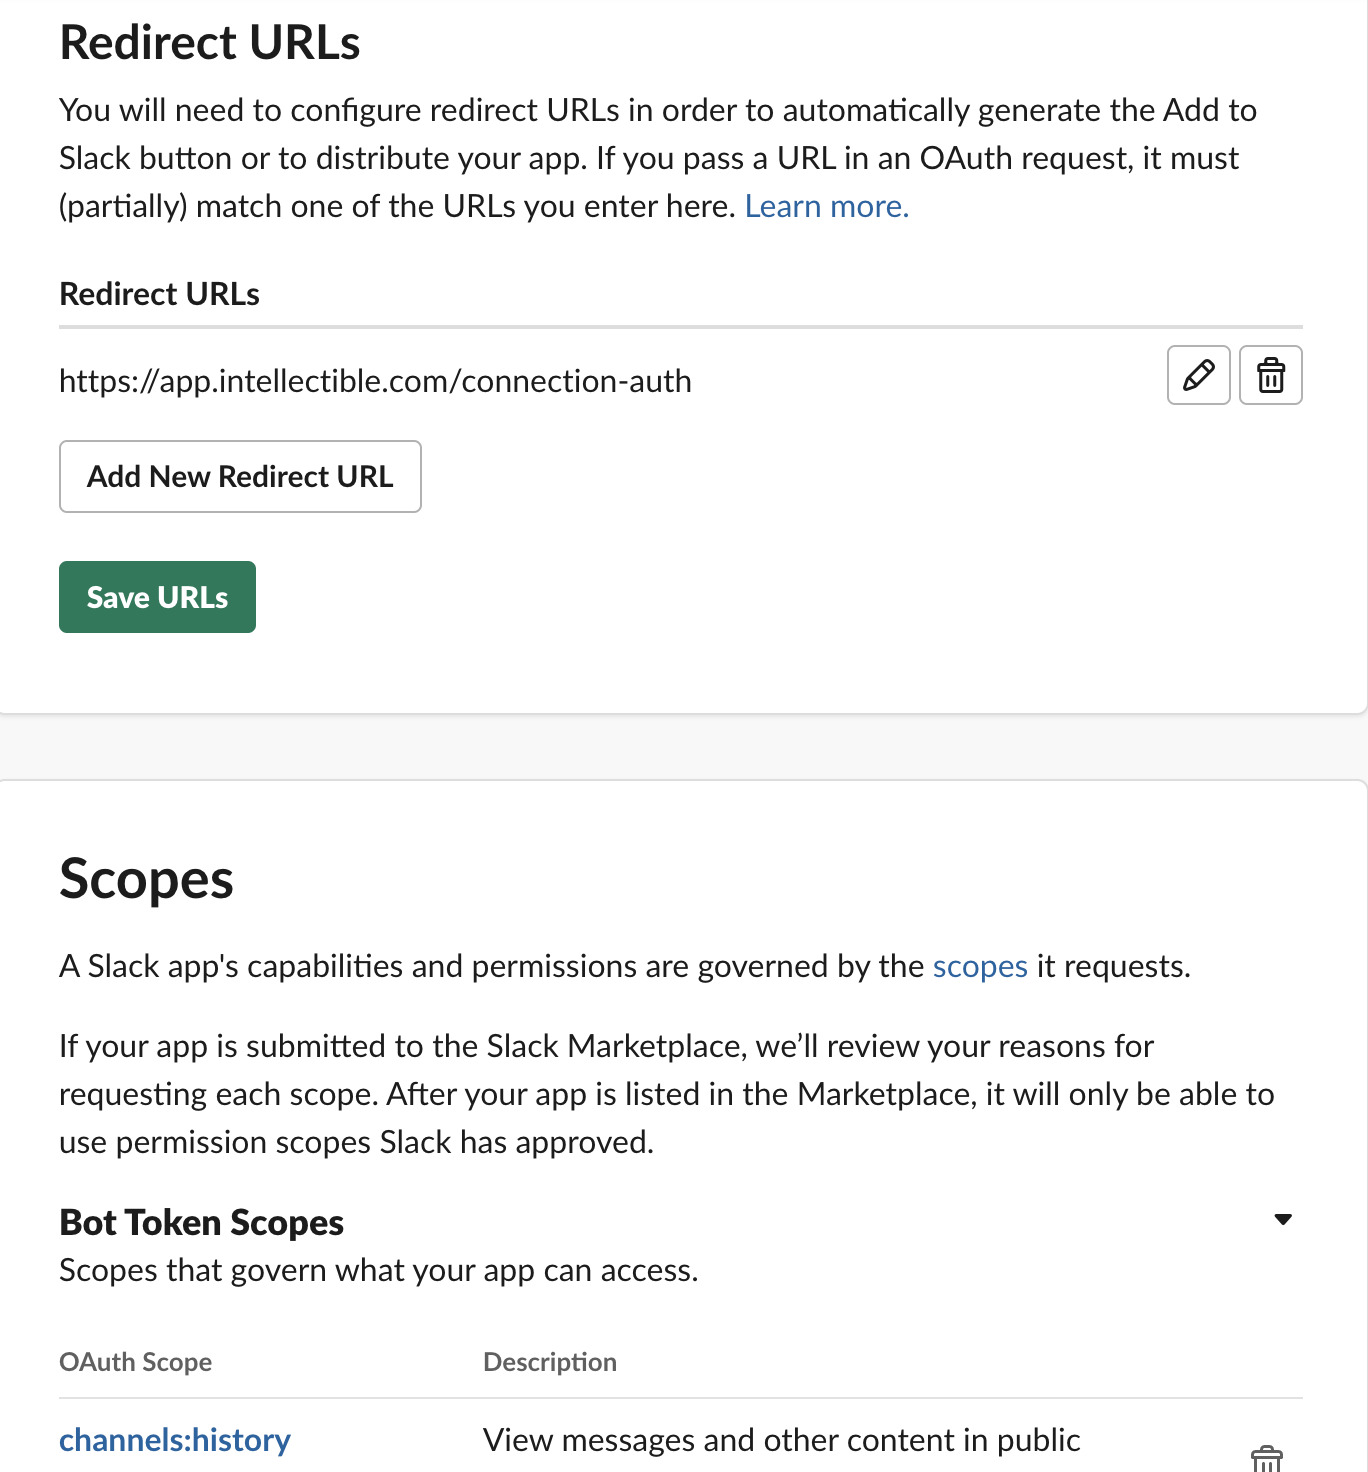
Add Redirect URLs
- Still in the "OAuth & Permissions" page, scroll to the "Redirect URLs" section
- Add the following redirect URL:
https://app.intellectible.com/connection-auth - Click "Add" for each URL, then click "Save URLs"
-
Add Bot Token Scopes
- Scroll down to the "Scopes" section
- Under "Bot Token Scopes", add the scopes your workflows will need. Common scopes include:
channels:read- View basic channel informationchannels:history- View channels historychannels:manage- Manage public channelschannels:join- Join channelschat:read- Read messages as the botchat:write- Send messages as the botusers:read- View users in the workspaceusers.profile:read- View user profile informationusers:read.email- View email addresses of usersgroups:read- View basic private channel informationim:read- View basic direct message informationim:history- View basic direct message historympim:read- View basic group direct message informationmpim:history- View basic group direct message history
 Choosing Scopes
Only add the scopes your workflows actually need. You can always add more scopes later if required.
-
Get your App Credentials
- In the left sidebar, navigate to "Basic Information"
- Scroll to the "App Credentials" section
- You'll need:
- Client ID
- Client Secret (click "Show" to reveal it)
- Keep these credentials secure - you'll need them in the next step
Adding the Custom Slack App Connection in Intellectible
-
Navigate to Connections
- Go to https://app.intellectible.com/connections
- Click "Add a new Connection" plus icon
- Select "Slack" from the connection types
-
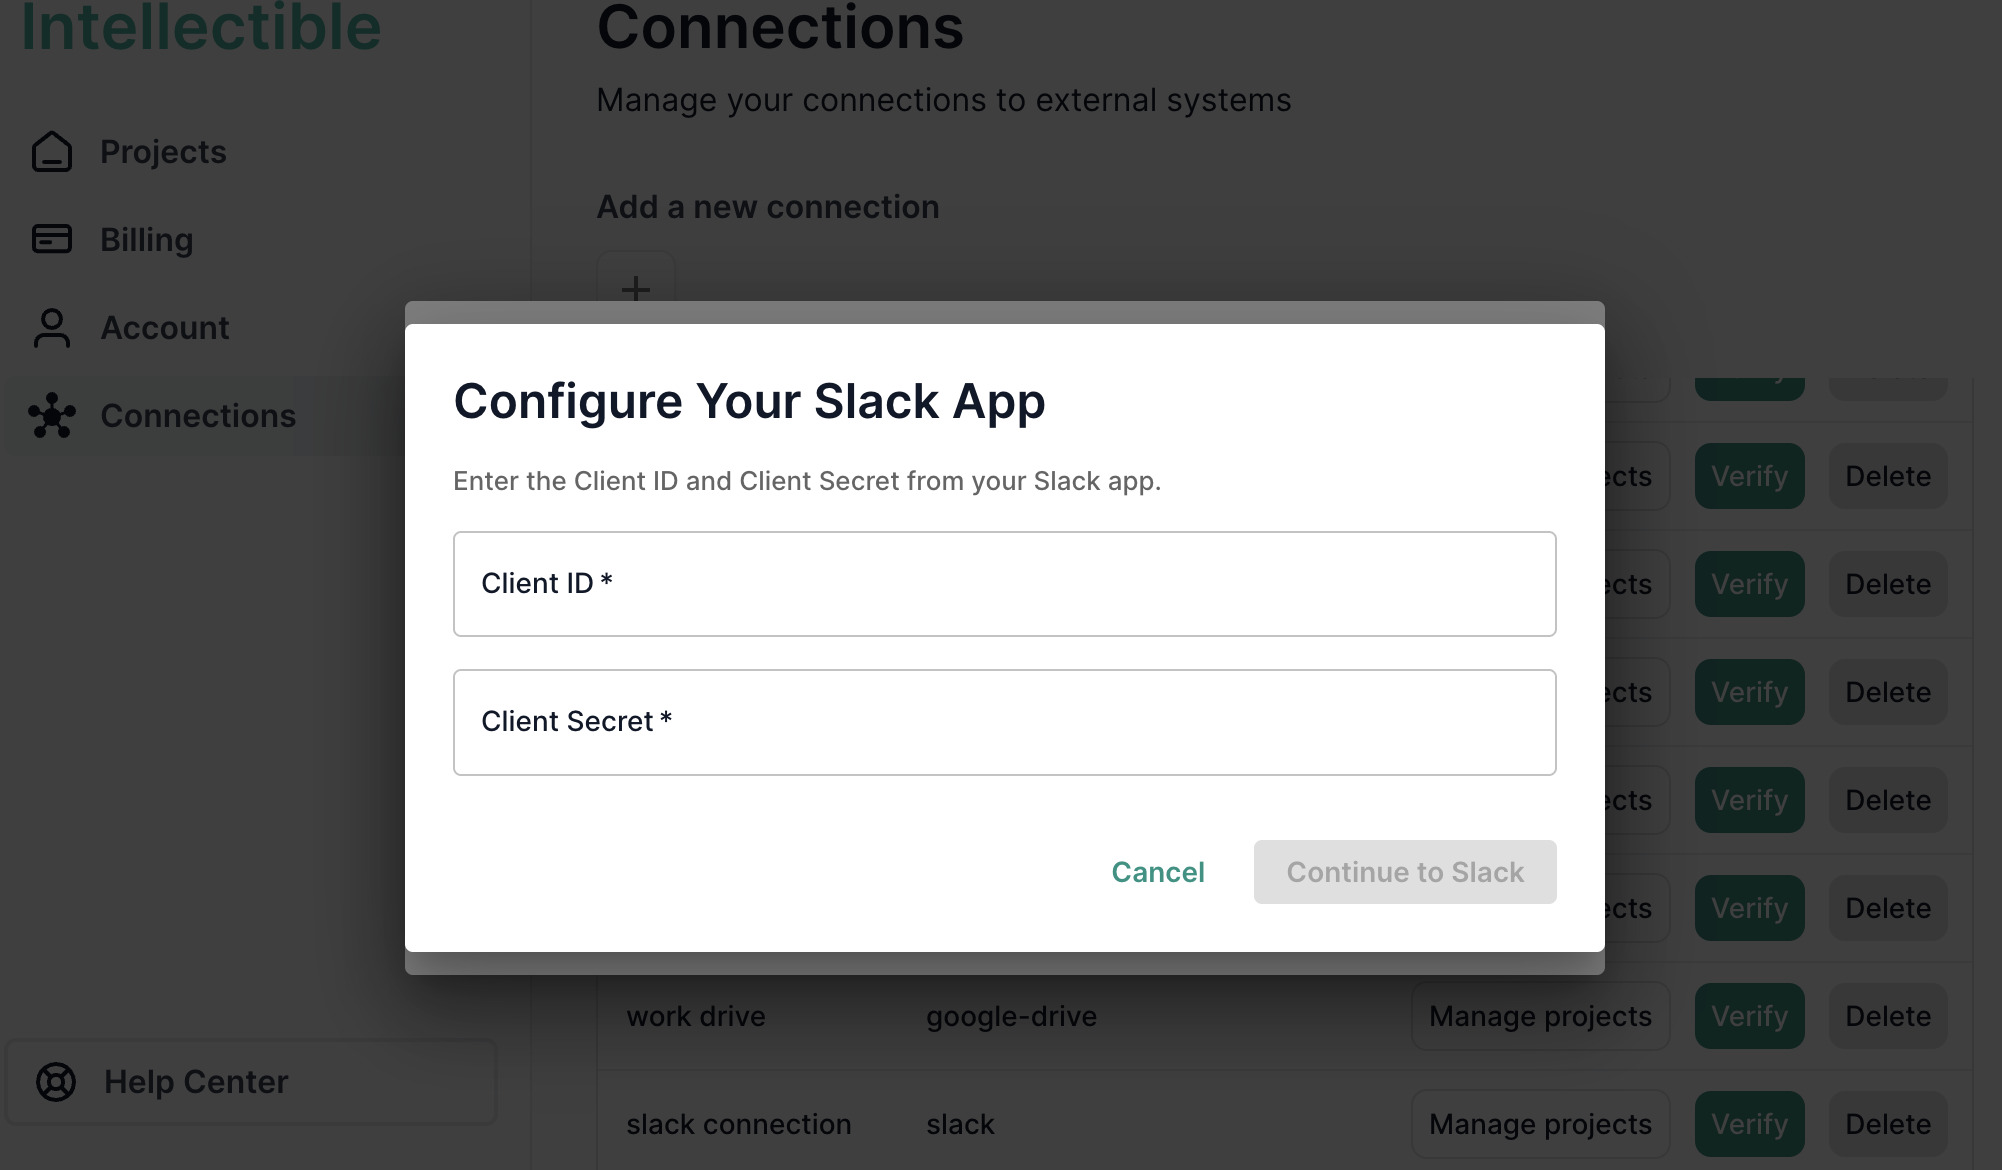
Enter App Credentials
- In the dialog box, enter:
- Client ID - from your Slack app's Basic Information page
- Client Secret - from your Slack app's Basic Information page
- Give your connection a descriptive name
- In the dialog box, enter:
-
Authenticate
- Click Continue to Slack
- You'll be redirected to Slack to authorize the connection
- Select the workspace you want to connect
- Click "Allow" to grant permissions
-
Verify and Assign to Projects
- Once authentication is successful, you'll see "Connection verified successfully"
- Click "Manage Projects" to add the connection to the projects that need it
- Your workflows can now use this Slack connection to interact with your workspace
Salesforce Connections
Intellectible supports Salesforce connections. This allows you to create workflows that interact with Salesforce using your own Salesforce External Client App (ECA) credentials.
This guide walks you through creating and configuring an External Client App in Salesforce so you can connect it to Intellectible.
What you’ll need
- Admin access to your Salesforce org
- REST API enabled in your Salesforce org
- Access to Intellectible
Creating a Salesforce External Client App
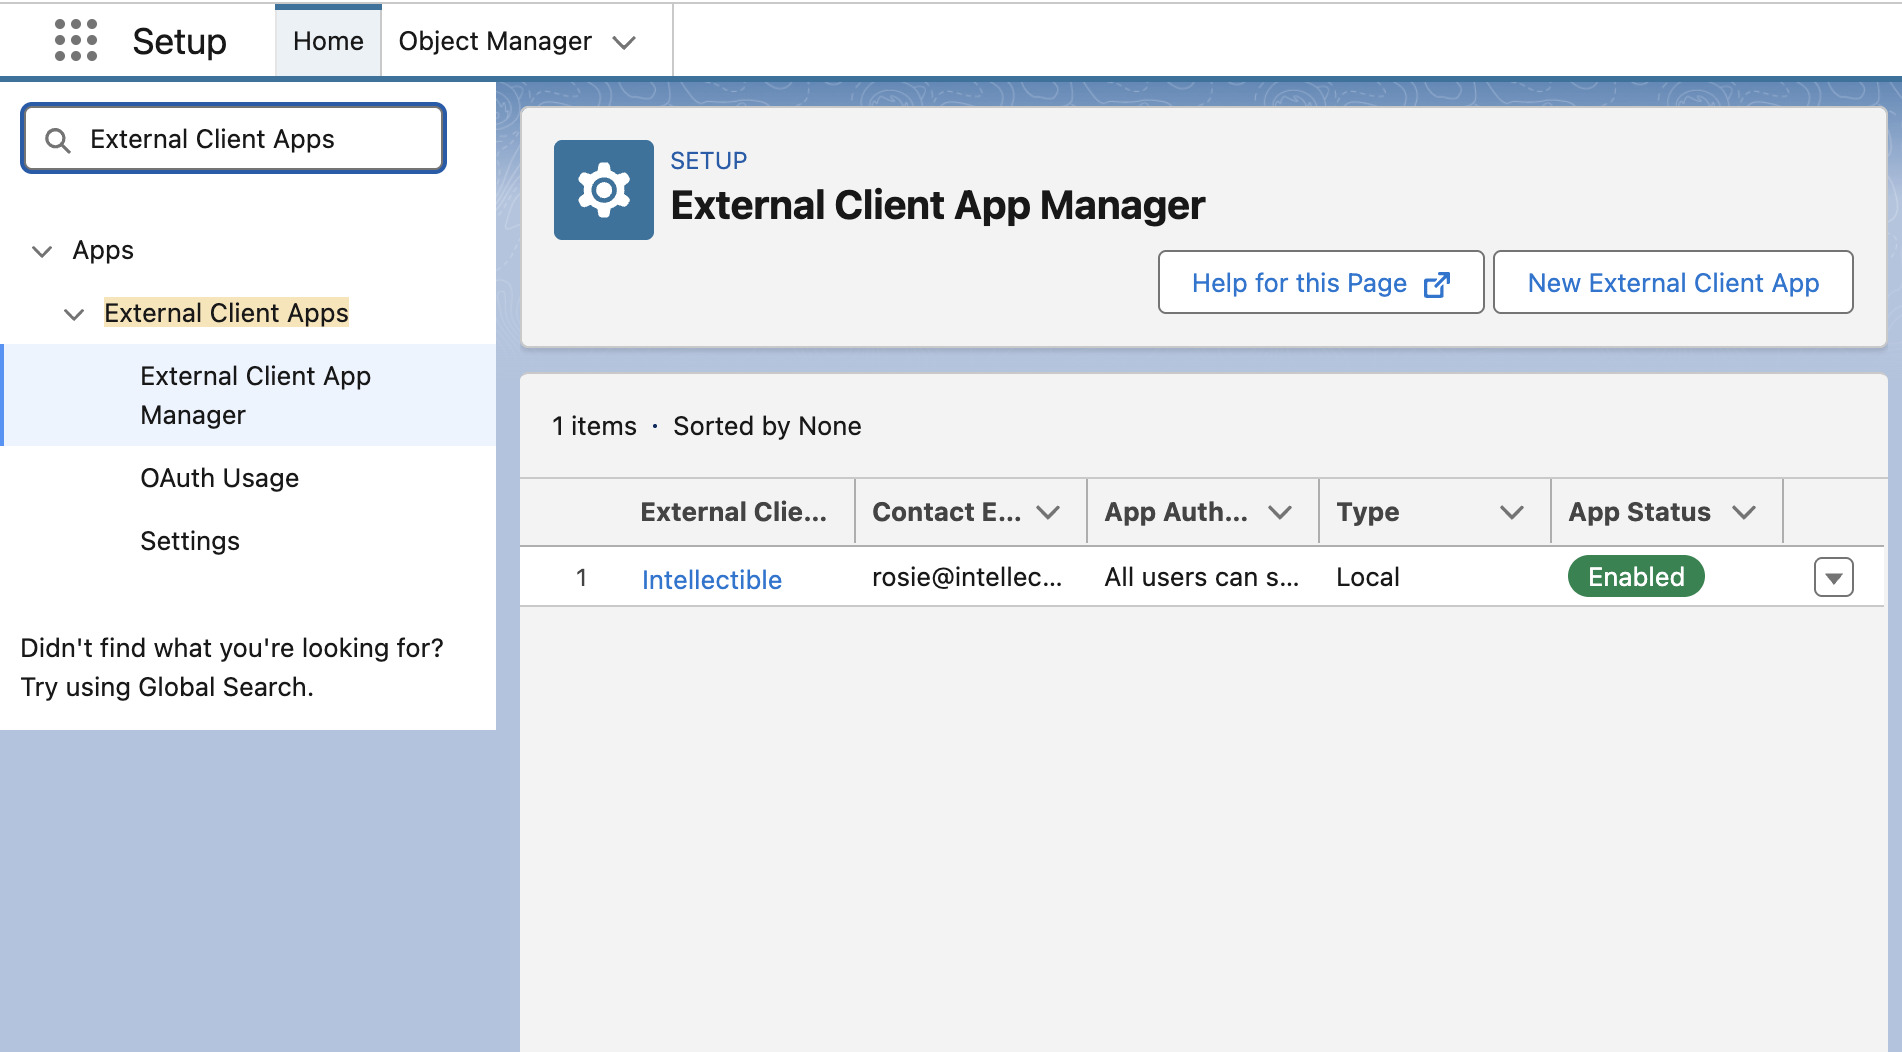
- In your Salesforce instance, go to Setup.
- Search for External Client Apps and click on External Client App Manager.
- Click on New External Client App.
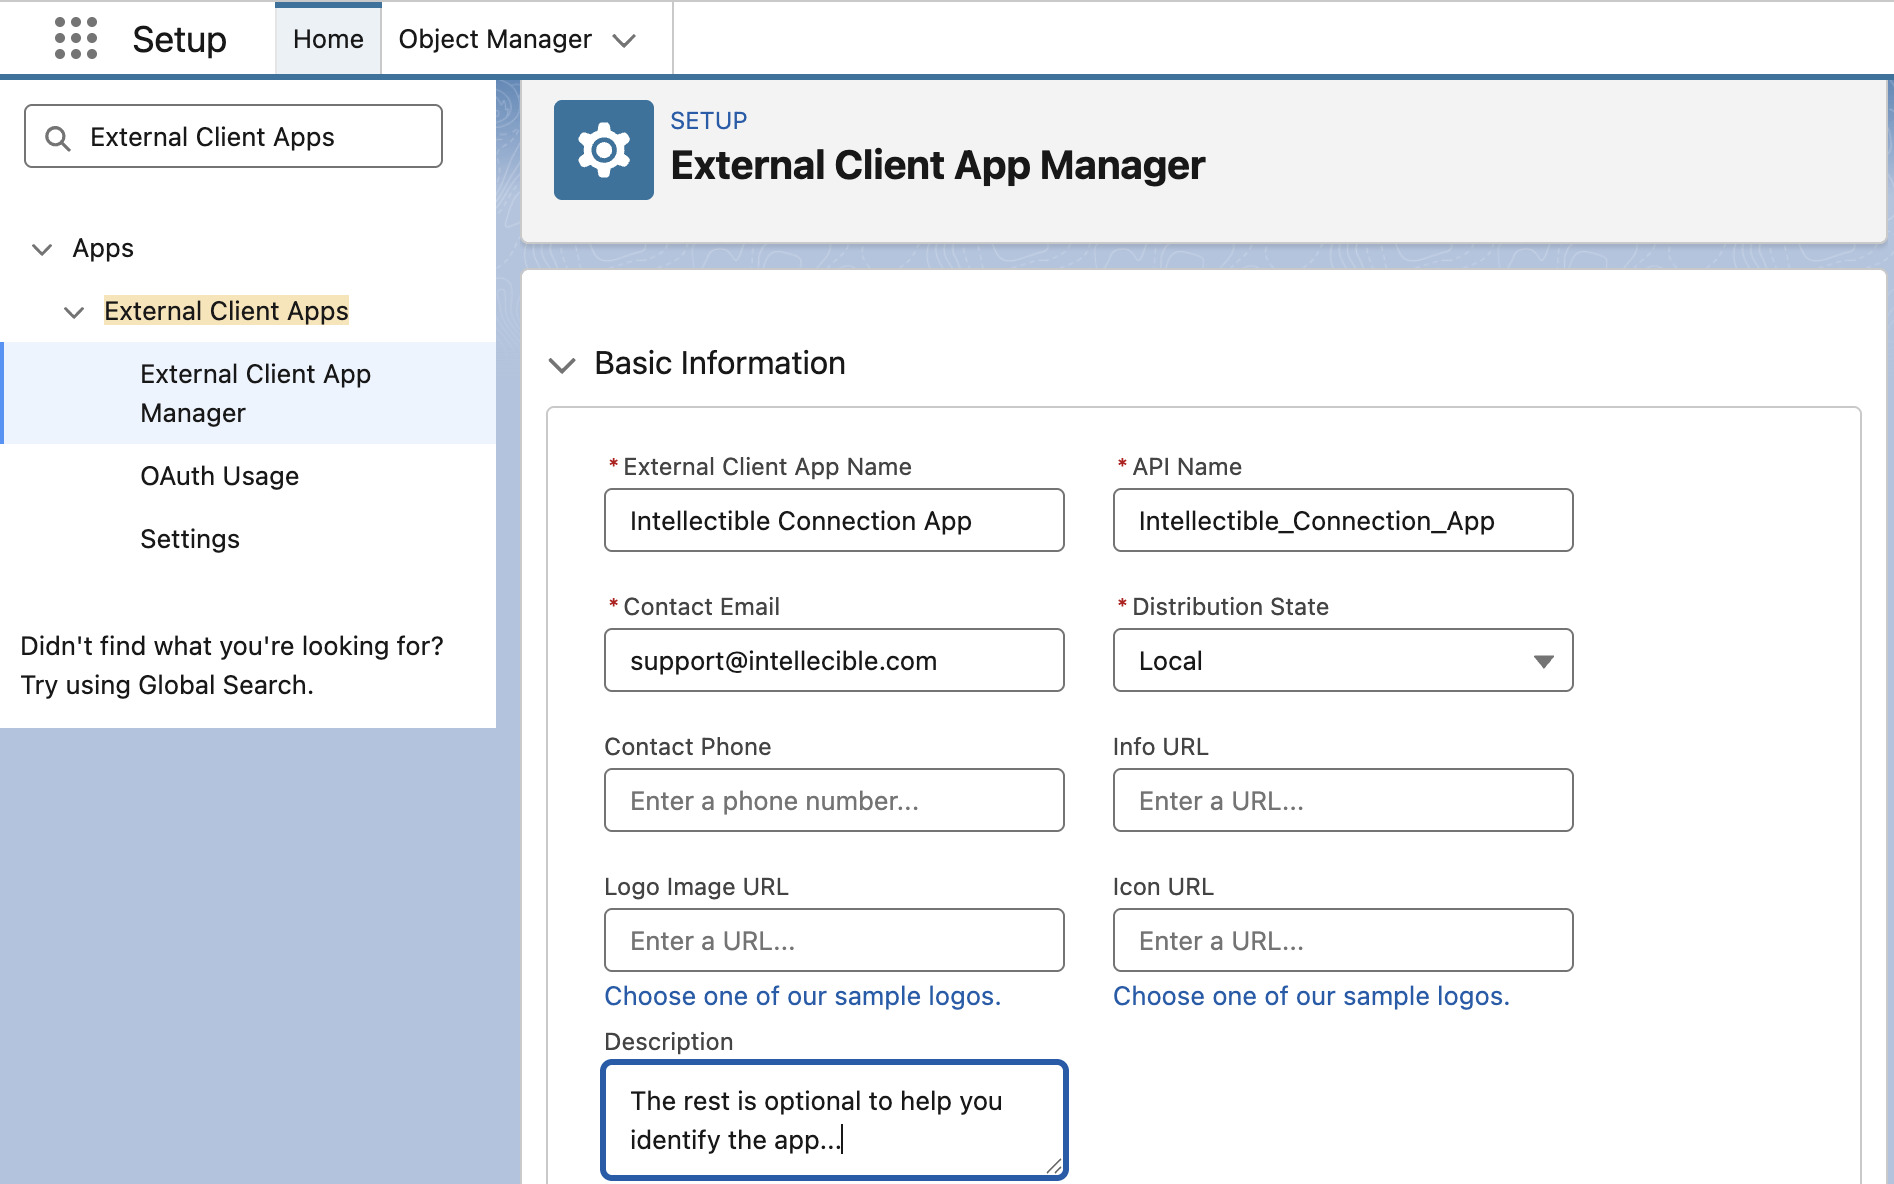
Configure Basic Information
In the Basic Information section of your new External Client App, configure the following:
- External Client App Name: A descriptive name for your app (e.g.,
Intellectible Connection App). - Contact Email Address: An email address for Salesforce to contact you about this app (e.g., your email).
- Distribution State:
Local
Configure OAuth settings
Under API (Enable OAuth Settings) tick Enable OAuth
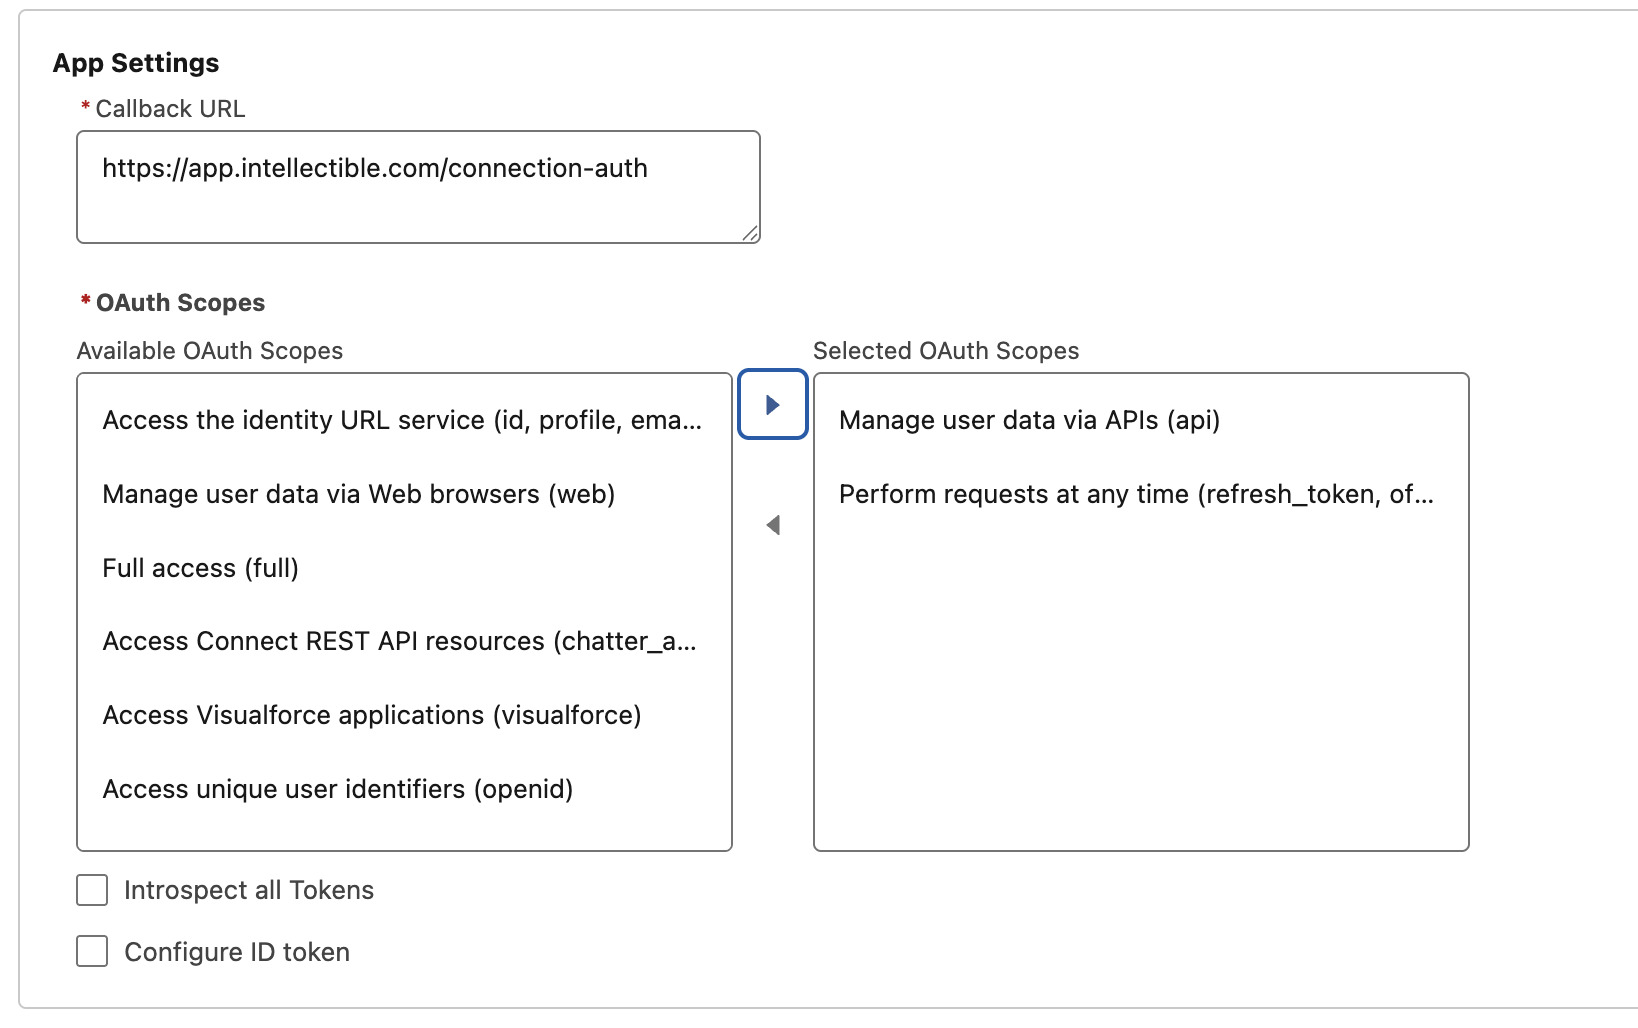
In App Settings configure the following:
- Callback URL:
https://app.intellectible.com/connection-auth - OAuth Scopes: Add
apiandrefresh_token
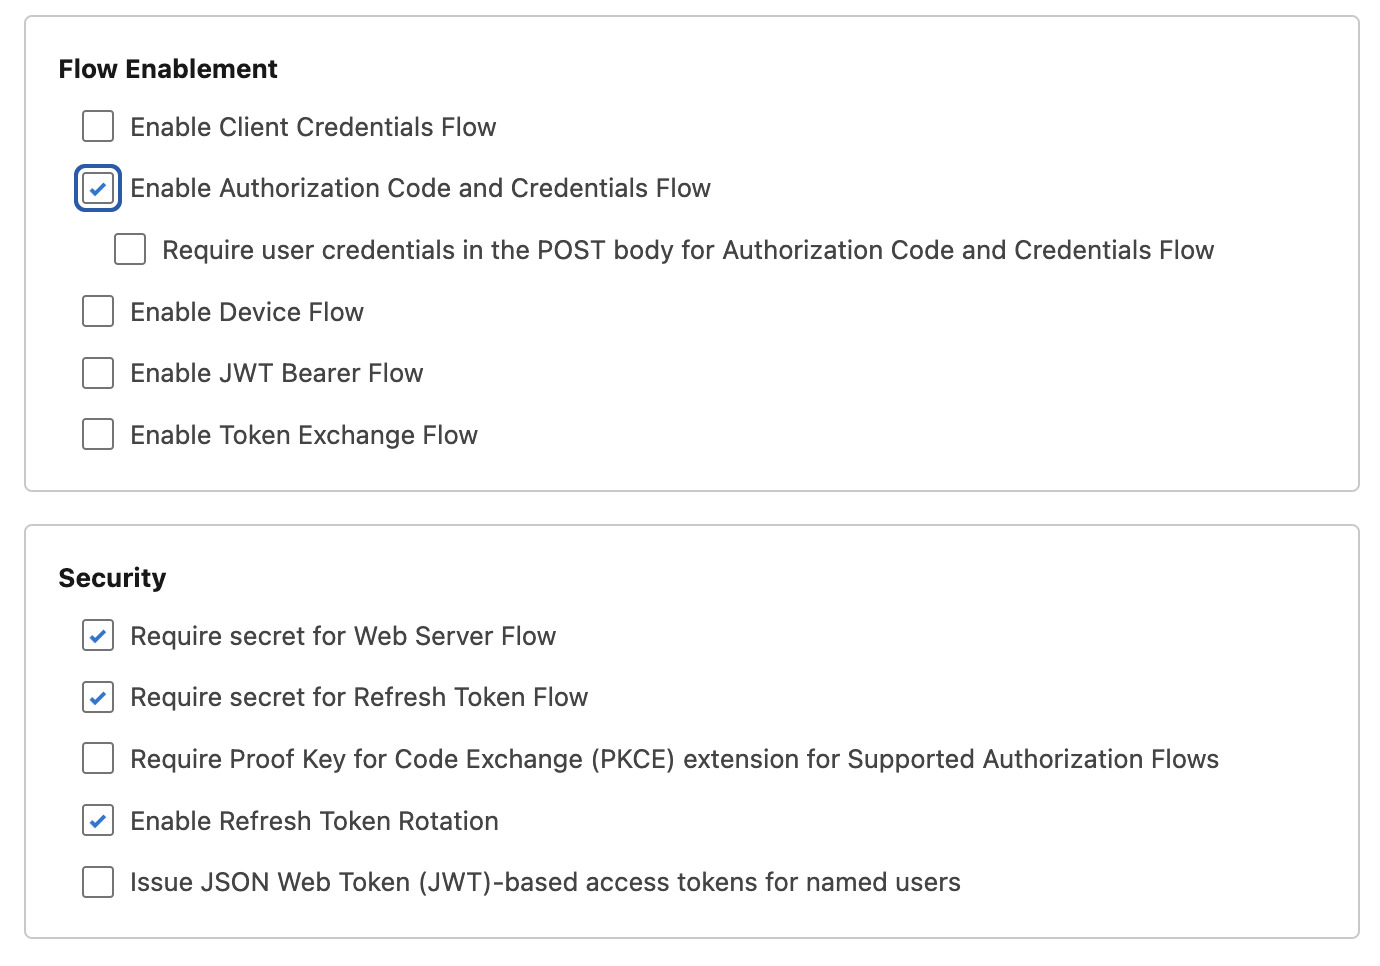
In Flow Enablement enable the following:
Authorization Code and Credentials Flow
In Security enable the following:
Require secret for Web Server FlowRequire secret for Refresh Token FlowEnable Refresh Token Rotation
Click Create to save your External Client App.
Policies
Go to the External Client App Policies tab and click Edit.
Under App Policies select OAuth.
Under OAuth policies, in Plugin policies, configure the following:
- Permitted Users:
All users may self-authorize(recommended for self-serve onboarding) - OAuth Start URL:
https://app.intellectible.com/connections
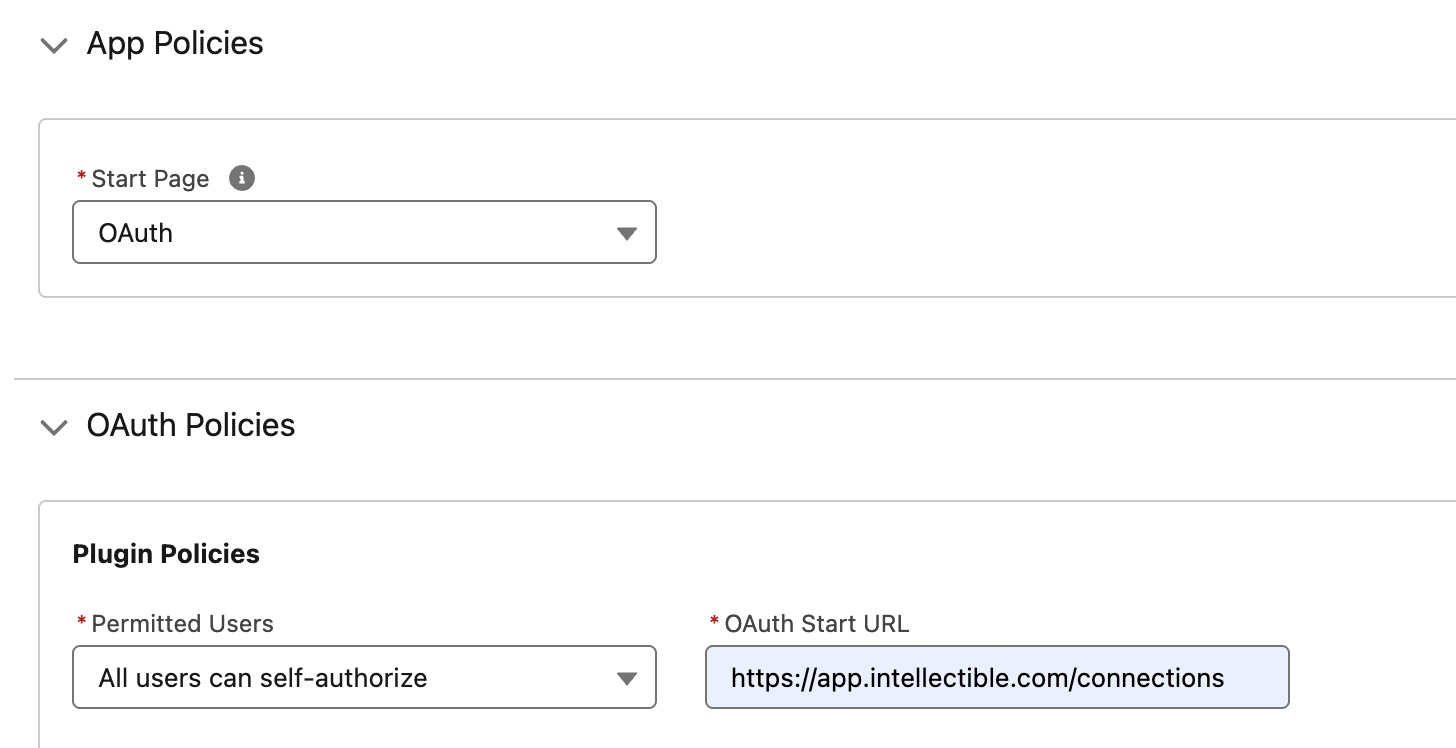
Click Save to save your policies.
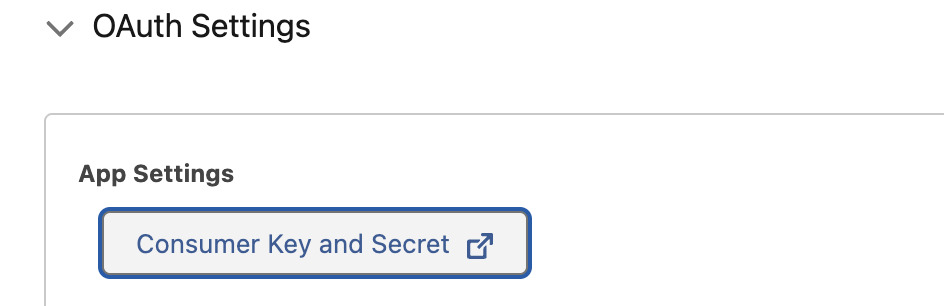
Copy your Client ID and Client Secret
After saving the app, go to you External Client App, go to Settings/OAuth Settings/App settings and do the following:
- Click on Consumer Key and Secret
- Verify your Identity
- Copy your Client ID (Consumer Key) and Client Secret (Consumer Secret) to a secure location. You will need these to connect your Salesforce account to Intellectible.
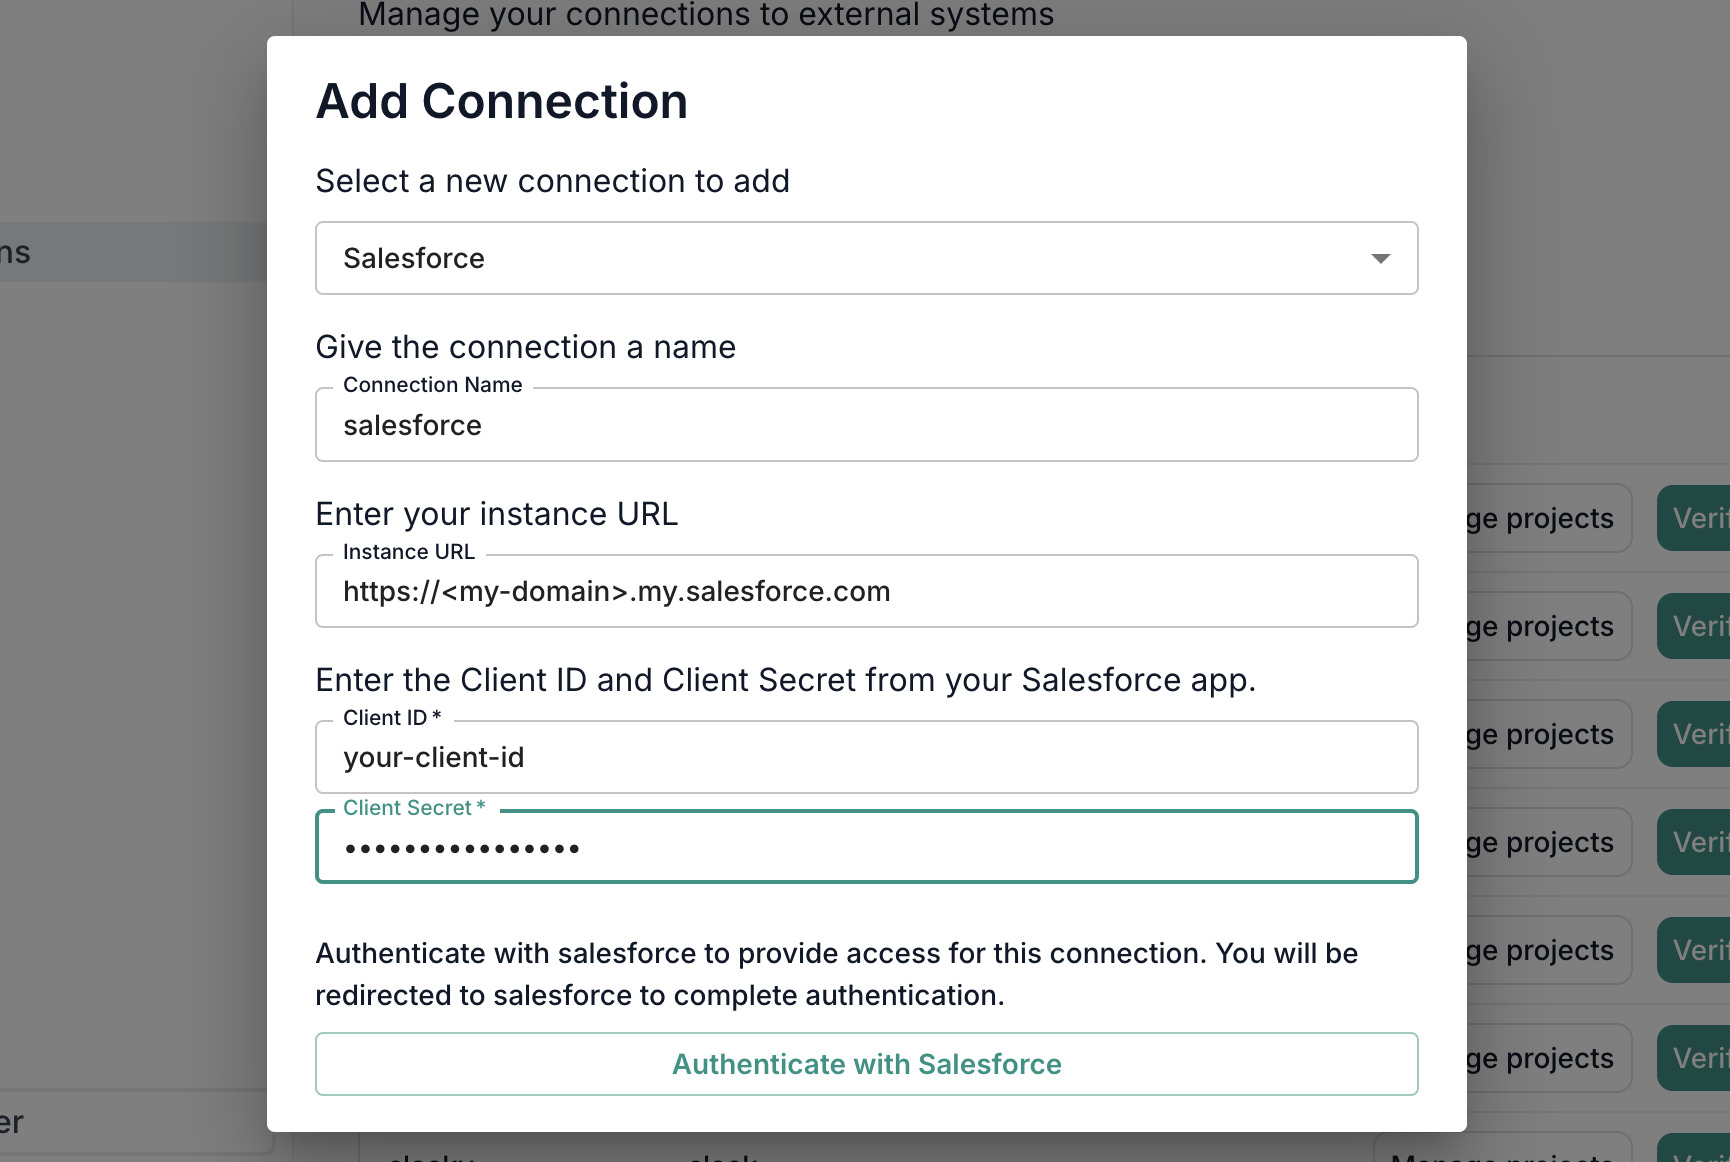
Connect Salesforce to Intellectible
In Intellectible, go to https://app.intellectible.com/connections and click on the "Add a new connection" plus icon.
Configure the connection as follows:
- Connection Type: Salesforce
- Connection Name: A descriptive name for your connection (e.g.,
Salesforce Connection) - Instance URL: The URL of your Salesforce instance (e.g.,
https://mycompany.my.salesforce.com) - Client ID: The Client ID you copied from your Salesforce External Client App
- Client Secret: The Client Secret you copied from your Salesforce External Client App
Click Authenticate to authenticate with Salesforce and complete the connection setup.
You will be redirected to Salesforce to authorize the connection. Select your account and click Allow to grant permissions.
After successful authentication, you will be redirected back to Intellectible and see a message confirming that the connection was verified successfully. Your connection should appear in the connections list, and you can now add it to your projects and use it in your workflows.
Go to Setup and search for My Domain in Salesforce Setup to find your instance URL. It will be in the format https://<my-domain>.my.salesforce.com.
Troubleshooting Microsoft Accounts
Use this section if you’re having trouble connecting Microsoft accounts (e.g., SharePoint/Outlook) to Intellectible.
Before you begin
- Who should perform the connection: Someone authorized to approve apps for your organization (for example, a Microsoft Entra administrator such as Global Admin, Application Admin, or Cloud Application Admin). If your organization blocks user consent, an admin will need to approve once on behalf of the organization. (see the Verify Entra Authorization Level section)
- Start from Intellectible: Always initiate the connection from within Intellectible (see the Connect section). Do not start the process in the Azure portal.
How to verify if you are an administrator in Entra
If you are unsure whether your account can approve apps for your organization:
- Sign in to the Microsoft Entra admin center.
- Go to Microsoft Entra ID → Users → Your account → Assigned roles.
- Look for roles such as Global Administrator, Application Administrator, or Cloud Application Administrator.
- If you see one of these, you can approve the Intellectible connection.
- If not, ask your IT team or someone with one of these roles to complete the connection for you.
Connect the correct way (always use Intellectible)
- In Intellectible, go to Connections → Add Connection → Microsoft.
- Sign in to Microsoft when prompted and review the requested access.
- If you’re an administrator and want to authorize for everyone in your organization, select “Consent on behalf of your organization.”
- Click Accept. You will be redirected back to Intellectible, and the connection will complete automatically.
Do not use Azure Portal → Enterprise applications → Grant admin consent for this setup. That portal flow uses a Microsoft portal redirect URL that is not part of Intellectible’s connection process and commonly causes redirect errors. Always start from Intellectible.
If you used the Azure Portal’s “Grant admin consent” by mistake
No problem—nothing is permanently changed. To reset:
- In Azure AD → Enterprise applications, open the entry for Intellectible.
- Go to Permissions and click Revoke admin consent (if available).
- (Optional) In Properties, click Delete to remove the Enterprise application entry.
- Return to Intellectible and repeat the Connect the correct way steps above. The entry will be recreated automatically when consent succeeds.
Common errors & quick fixes
-
AADSTS50011 — Redirect URI mismatch
This usually occurs when the Azure Portal’s Grant admin consent was used.
Fix: Start consent from Intellectible (see Connect the correct way). -
AADSTS65001 — Consent required / not granted
Your organization blocks user consent or your account isn’t permitted to approve.
Fix: Have an authorized administrator complete the connection from Intellectible and (if appropriate) select “Consent on behalf of your organization.” -
AADSTS700016 — Invalid client ID
You may be viewing the wrong Enterprise application in the portal.
Fix: Start again from Intellectible so the correct application is used automatically. -
invalid_grant — Code/redirect issue or code reused
The sign-in flow wasn’t completed in one continuous step.
Fix: Restart from Intellectible and complete the flow without refreshing or using the back button.
Verify it worked
- In Intellectible, a connection verification shows Connection verified successfully.
- Use Manage Projects to add the connection to the projects that need it.
- You can now browse or attach Microsoft resources in your workflows as applicable.
Still stuck?
Share this with your IT/admin:
- A screenshot of the full error and the exact time (with timezone).
- Who attempted the connection and confirmation that it was started from Intellectible (not via the Azure Portal button).
- Whether your organization requires an admin to approve apps or blocks user consent.