Databases
Intellectible databases are managed PostgreSQL databases within your project. Use them to store structured information that needs to be retrieved, updated, related, and queried: customer records, orders, extracted document fields, application data, or the results of an automation.
A database contains tables. Each table has columns describing the information you store and rows containing individual records. For example, an invoices table might have columns for invoice_number, supplier, total, and status, with one row per invoice.
You can work with the same data in the database viewer, ask the agent to inspect or change it, connect it to workflows, or access it from application code through the API. These are different interfaces to the same database—not separate copies of your data.
Create and open a database
Open Databases in your project's navigation. Choose Create your first database or Click To Create New Database, give it a descriptive name, and wait for creation to finish. Open the database to view its tables.
Use the table panel to select an existing table or add a new one. Give tables and columns clear names; lowercase names with underscores, such as customer_orders and order_total, work well across the editor, workflow nodes, and API.
Choose column types to match your data. The column editor includes text, numbers, booleans, and JSON, as well as vector and text-search vector types for search-oriented workflows. Use a number column for an amount you will calculate with, rather than storing formatted currency as text. JSON is useful for structured values that do not fit naturally into separate columns.
Start with the fields your process actually needs. You can add more columns as the application develops, but review changes to tables already used by workflows or code.
View and update data
Select a table to open its rows in the grid. Search the table list to find a table by name, use the column-header sort controls to change the row order, and use Page and the rows-per-page control to browse larger tables.
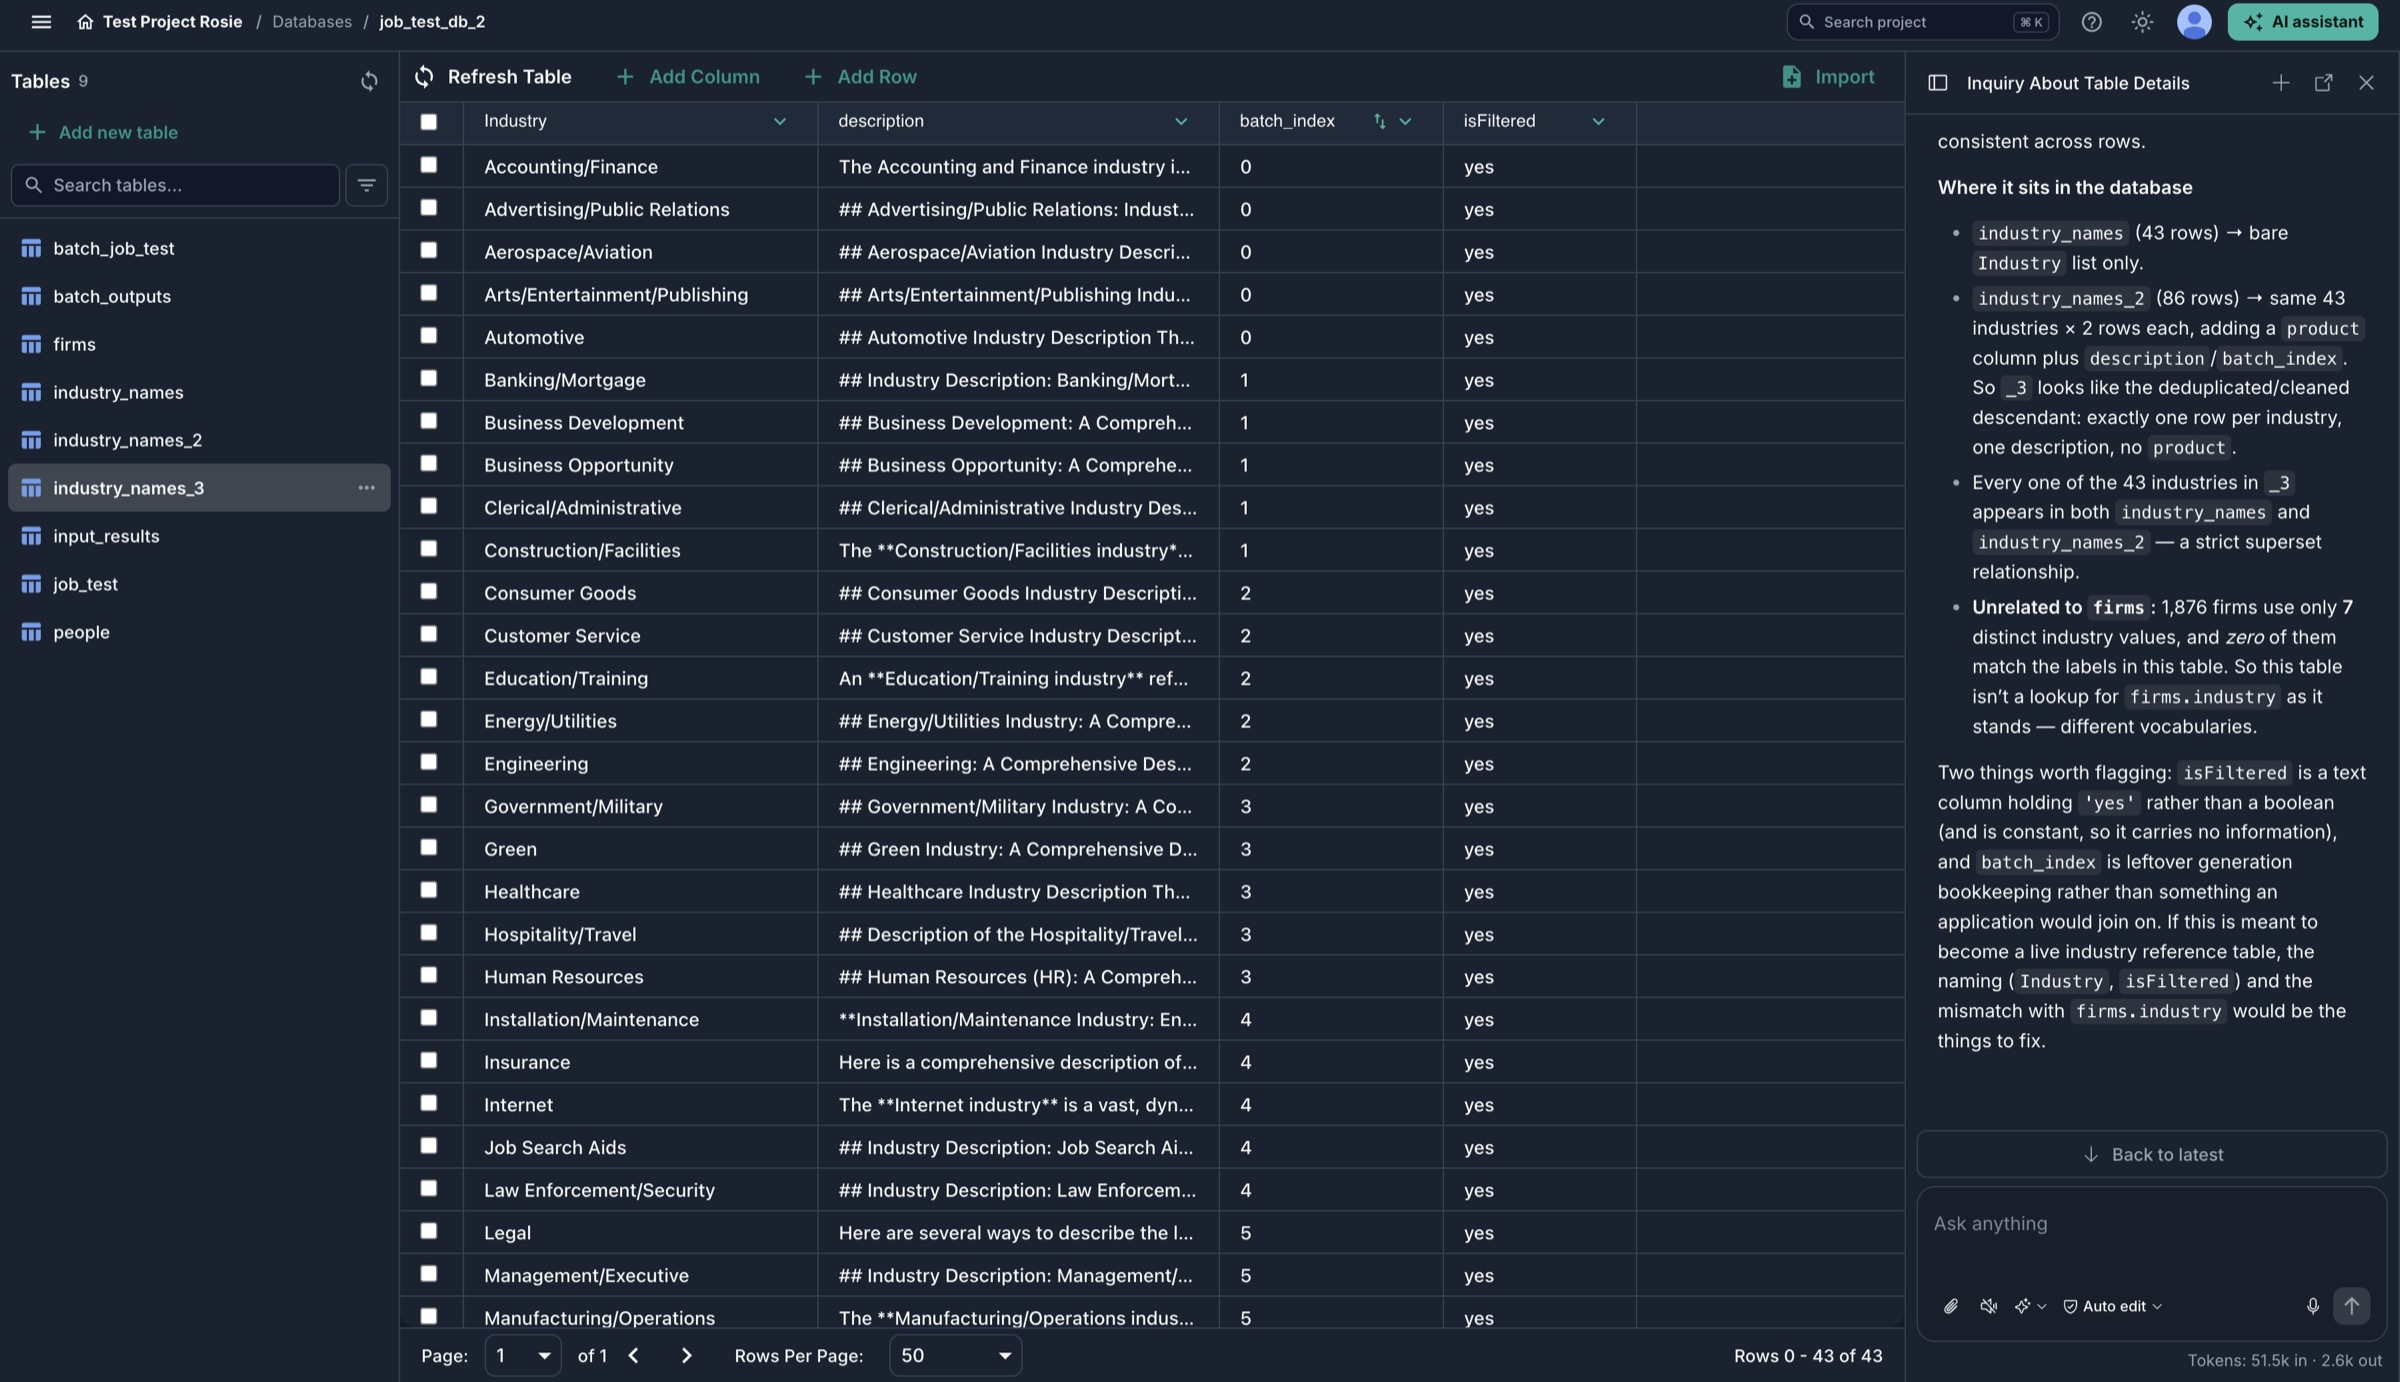
Browse tables, inspect records, and ask the agent to explain the data without leaving the database workspace.
| Task | What to do |
|---|---|
| See recent changes | Click Refresh Table, especially after a workflow, API call, or agent has changed the data. |
| Add a record | Choose Add Row, fill in the fields, then click Create Row. |
| Change a value | Open an editable cell, change its value in the cell editor, and click Save. |
| Add fields | Choose Add Column, enter each column's name and type, and create the columns. |
| Remove records | Select the rows with their checkboxes and use the delete action, then review the confirmation. |
The available cell editor depends on the column type; not every PostgreSQL type has an interactive editor. For more complex transformations or bulk changes, use the agent or a workflow with SQL.
Changes are written to the database, so other consumers can see them. Deleting rows, columns, tables, or an entire database can permanently remove data. Check the target and keep a suitable backup or export before destructive work; do not assume there is an undo action.
Import a CSV from the Library
CSV import is useful when you already have a spreadsheet export or a larger set of records.
- Upload the CSV to the project's Library.
- Open the destination database and table, then open the CSV import dialog from the table toolbar.
- Choose Select library file and select the CSV.
- Review the column mapping. Choose which source columns to import, their destination names, and the available type settings. The snake_case all control helps normalise names.
- Click Import CSV and monitor its progress and result.
Check the imported rows and types before using them in an automation. If an import reports a failure, read its details and check whether any rows were already committed before retrying; repeating an import can create duplicate records.
Work with the agent
Open the Intellectible agent while viewing a database. It receives the database and currently selected table as context, so you can discuss the data you are looking at. When working from elsewhere, identify the database and table explicitly.
The agent has tools to list databases and tables, inspect column definitions, create tables or columns, and run SQL to read or update data. You do not need a module just to use these database tools.
Start by asking it to inspect the structure before proposing changes:
Inspect the
invoicestable and explain its columns. Show the ten largest invoices that are still awaiting review. Do not change any data.
For an update, define the intended scope:
Find invoices with status
pendingand a total of zero. Show me the matching records and proposed update first. After I approve it, change only those records toneeds_review.
You can also ask for help designing a table:
Propose a table for tracking customer support requests, including a reference, subject, status, and priority. Explain the column types before creating it.
Review proposed SQL and any approval request carefully. SQL can read data, but it can also update many rows or remove entire tables. After a change, refresh the table and check the result. For large datasets, ask for a filtered sample or summary rather than every row.
Use databases in workflows
Database nodes let an automation read records, save results, and query data. Select the project database and, where required, its table in the node's settings.
| What you need | Node |
|---|---|
| Read records | Read DB |
| Insert one or more records | Insert Into DB |
| Run SQL for filtering, joins, summaries, or updates | Query DB |
| Count records | Count Rows In DB |
| Remove records | Delete From DB |
For example, an invoice-processing workflow can read a PDF from the Library, extract its fields with AI, and pass an object containing those fields to Insert Into DB. Keep the original PDF in the Library and store its file reference alongside the extracted values in the database.
Connect the node's event input as well as its data inputs. Inspect its result for errors before proceeding: a completion event alone is not proof that the database operation succeeded. See Using the workflow editor and workflow logs.
Use Query DB when you need PostgreSQL SQL. For an invoices table with the columns introduced above, a read-only summary might be:
SELECT supplier, SUM(total) AS total_amount
FROM invoices
WHERE status = 'approved'
GROUP BY supplier
ORDER BY total_amount DESC
LIMIT 20;
For updates or deletes, first check the rows matched by the intended condition. Do not concatenate untrusted application input into raw SQL. Inserting records can also create missing columns from their field names, so validate incoming objects and watch for spelling mistakes that would create unintended fields.
Access databases through the API
Modules and external applications can use the public API to list databases, inspect tables, read and insert rows, update cells, import CSVs, or execute SQL.
Use a project API key with permissions for the required database. Send the raw key in the Authorization header, without a Bearer prefix, and keep it in trusted server-side code. For a module, see Using project services.
Choose permissions according to the operation:
| Permission | Purpose |
|---|---|
databases.read | Browse databases and tables, inspect their structure, and read rows. |
databases.write | Insert rows, update cells, and start CSV imports. |
databases.delete | Delete rows. |
databases.schema | Create or remove tables and columns. |
databases.query | Execute arbitrary SQL, including statements that change or delete data. |
databases.admin | Create or remove whole databases. |
For a read-only application, prefer the Read rows endpoint with databases.read. It supports column selection, sorting, and pagination without granting SQL execution. Use explicit paging rather than assuming one response contains the whole table.
Treat databases.query as powerful access, not a read-only permission. A CSV import additionally needs Library read access to its source file. Grant only the operations the application needs, and validate requests before your backend uses its project key.
See the database API guide for request examples and endpoint details.